
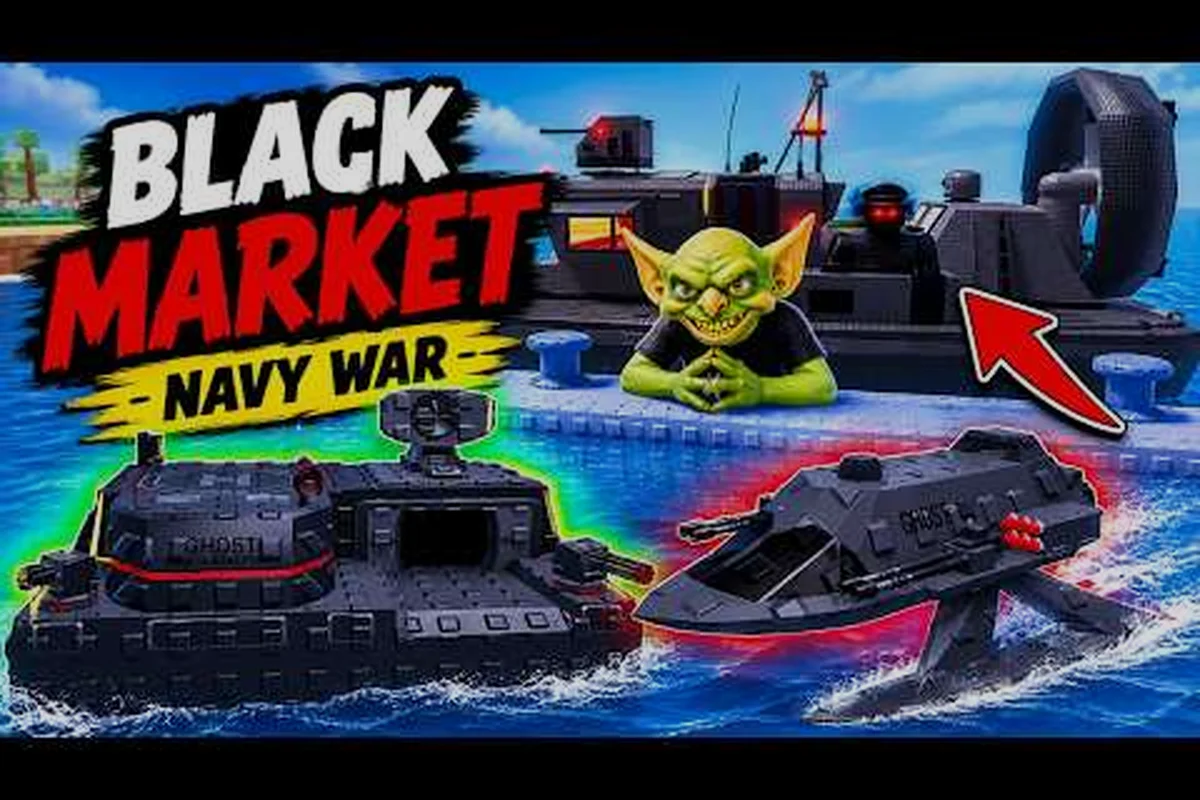
The first 48 hours in Navy War decide whether your island economy will float or sink, and most rookies stall at the harbor because they place the wrong building in the wrong slot. This guide breaks down Navy War how to build a base from the first dock all the way to a tier-3 naval fortress, with a real expansion order pulled from the official Navy War page on Roblox. Expect hard numbers on wood, steel, and oil, plus the build-priority table experienced commanders use when they reset a fresh island.
Navy War is a 6-player co-op strategy title by Parabola MMOVEMENT where you build an island naval base, queue ship classes (Destroyer, Cruiser, Battleship, Submarine, Aircraft Carrier), and contest sea lanes against rival crews. According to the official game page, it has logged 11.4M+ visits and 94,038 favorites as of early September 2026, which means most of the islands you scout were built by players who already know the order below.
First Harbor: Starting Slot Layout and Core Buildings
The opening island only gives you 4 buildable tiles and 1 dock slot. Waste any of them on a defensive tower and your oil income never starts, so lock the first harbor to the four buildings below before logging off session one.
| Slot | Building | Cost (Wood / Steel / Oil) | Output / Effect | Why it goes here |
|---|---|---|---|---|
| 1 | Lumber Mill | 80 / 0 / 0 | 12 wood per minute | Every other structure needs wood; the mill is the only one that pays back inside the first hour |
| 2 | Steel Mill | 120 / 0 / 0 | 8 steel per minute | Steel gates the Dock upgrade to tier 2; without it you cannot queue a Cruiser |
| 3 | Oil Rig | 150 / 20 / 0 | 6 oil per minute | Oil is the bottleneck currency for Submarines and Aircraft Carriers, so start it on day one even at a loss |
| 4 | Command Post | 200 / 40 / 10 | +10% build speed, +1 queue slot | Multiplies every minute of resource generation you just set up |
The Dock itself is the 5th structure and ships free on session start, but you still need to claim the slot before island capture timers expire. Place the Lumber Mill in the tile closest to your Dock, because Dock upgrades refund 5% of the nearest resource building's cost, and wood is the only resource you can afford to refund early.
Resource buildings are not interchangeable. Community testing reported by players on the Roblox Discord shows that an island running 2 Lumber Mills and 1 Steel Mill reaches tier-2 Dock two hours faster than an island running a "balanced" 1-1-1 start, because the second mill front-loads wood for the Command Post and Oil Rig together instead of forcing you to wait through two separate upgrade cycles. Keep that 2-1-1 ratio until the Command Post is online, then rebalance.
Unlocking the Second Tile Ring
Tile ring 2 unlocks at Command Post level 3, which takes roughly 1,800 wood, 600 steel, and 80 oil in passive generation if you keep all three production buildings untouched. Do not tap oil storage to rush it: the 30% conversion penalty on early oil will snowball into a 45-minute Submarine delay later.
The moment ring 2 opens, you get 6 more tiles, a second Dock slot, and access to the Warehouse and Watchtower families. The expansion order from this point is fixed by the game's research tree rather than by personal preference, which is why following the research chain in sequence matters more than optimizing individual building placements.
Expansion Order: From Tier-1 Harbor to Tier-3 Naval Fortress
The base expansion guide below assumes you are playing solo or in a duo, where tier 1-3 build costs stay within a single player's resource cap. If you are running a 6-player alliance, multiply each resource threshold by 1.8x and skip to the co-op section further down, since the 36-hour Fortress unlock timer scales differently when construction rights are shared across an alliance pool. All timings below reflect a solo economy with a single Command Post at level 3 feeding the research queue.
| Stage | Trigger | Structures to add | Approx. time from start |
|---|---|---|---|
| Tier 1 | Default island | Lumber Mill, Steel Mill, Oil Rig, Command Post, Dock | 0 – 90 min |
| Tier 2 | Command Post L3, Dock L2 | Warehouse, Watchtower L1, 2nd Oil Rig | 90 min – 4 h |
| Tier 3 | Dock L3, Warehouse L3 | Shipyard, Factory, 2nd Lumber Mill, Defense Turret ring | 4 h – 14 h |
| Tier 4 | Command Post L5 | 2nd Dock, 3rd Oil Rig, Submarine Pen | 14 h – 36 h |
| Tier 5 | Fortress unlock (30+ hrs) | 2nd Shipyard, Aircraft Carrier Hangar, Coastal Battery | 36 h – 60 h |
The first three tiers are linear because the research tree forces them, but tier 4 onward branches. A solo player rushing PvP should unlock the Submarine Pen before the Aircraft Carrier Hangar, since submarines cost roughly 40% less oil per unit and arrive in 6 minutes instead of 22.
When to Queue Your First Real Warship
A common mistake is queueing a Destroyer the moment the Dock is online. The Destroyer costs 200 wood, 80 steel, and 30 oil, and the Dock at tier 1 only finishes one unit every 14 minutes. If you instead stockpile those exact resources and use them on the Steel Mill upgrade to level 2 (180 wood, 60 steel, 0 oil), your second ship comes out 11 minutes earlier than the queue-and-wait approach, according to timing logs shared by veteran crews.
Wait until the Dock is tier 2 (requires 1,200 wood, 400 steel, 40 oil) before you spend on a hull. At tier 2 the build time drops to 9 minutes and the queue slot count goes to 2, which means you can pipeline a Destroyer and a Cruiser back-to-back without losing resource throughput.
Resource Buildings List: What Every Structure Does
The economic buildings guide below covers every buildable structure on the island as of the September 2026 update. The numbers reflect community-reported averages from public servers; treat them as planning values rather than hard guarantees because the developer tunes rates per patch.
| Building | Family | Tier | Output | Storage cap | Best ratio per 6-tile ring |
|---|---|---|---|---|---|
| Lumber Mill | Resource | 1 | 12 wood/min (L1) → 38 wood/min (L5) | 800 wood | 2 |
| Steel Mill | Resource | 1 | 8 steel/min (L1) → 26 steel/min (L5) | 600 steel | 1 |
| Oil Rig | Resource | 1 | 6 oil/min (L1) → 19 oil/min (L5) | 400 oil | 2 |
| Warehouse | Storage | 2 | +500 cap per resource per level | n/a | 1 (upgraded to 3) |
| Command Post | Military | 1 | +10% build speed, +1 queue slot per level | n/a | 1 |
| Watchtower | Defense | 2 | +12% vision, reveals submarines in 1,200 studs | n/a | 2 |
| Defense Turret | Defense | 2 | 80 DPS, range 600 studs | n/a | 2 minimum |
| Dock | Naval | 1 | Queues ship classes, tier gates shipyard access | 250 hull HP | 1 → 2 |
| Shipyard | Naval | 3 | Required for Cruiser, Battleship, Aircraft Carrier | n/a | 1 → 2 |
| Factory | Industrial | 3 | Refines ore into steel at 1.4x ratio | n/a | 1 |
| Submarine Pen | Naval | 4 | Required for Submarine class, faster dive cycles | n/a | 1 |
| Aircraft Carrier Hangar | Naval | 5 | Required for Aircraft Carrier class | n/a | 1 |
| Coastal Battery | Defense | 5 | 240 DPS, range 1,200 studs, anti-ship | n/a | 1 |
| Naval Fortress | Citadel | 5 | +30% HP to all naval structures, +20% crit chance | n/a | 1 |
A balanced base carries 2 Lumber Mills, 1 Steel Mill, 2 Oil Rigs, 1 Warehouse, 1 Command Post, 2 Watchtowers, 2 Defense Turrets, 1 Dock, and 1 Shipyard once the third tile ring is online. The last 6 tiles in ring 3 are flex slots: most competitive players drop a Factory plus a second Watchtower, then save the rest for tier-4 unlocks.
The Factory Is Optional, But It Is Not Skip-able
The Factory does not produce steel on its own; it converts stockpiled ore (a drop from coastal raids) into steel at a 1.4x ratio. That sounds weak until you realize that the Steel Mill caps at 26 steel per minute at level 5, and a single Factory run after a 30-minute raid yields 90 to 120 bonus steel. Skipping the Factory means you will hit a hard steel wall every time you try to push the Shipyard to level 4, because the Shipyard needs 1,800 steel on its own.
If you are new, build the Factory in tile ring 3 as your 7th structure. If you are an experienced player, you can delay it to ring 4 and route the saved oil into a Submarine Pen instead. Both paths are valid; the trap is leaving the Factory out of the build order entirely and then wondering why your steel production feels permanently 30% short.
Economic Buildings Guide: Storage, Conversion, and Production Multipliers
Storage is the silent killer of new bases. Lumber Mill output is wasted the moment wood hits the 800 cap, and Oil Rig overflow converts at a punishing 30% loss into steel if you leave it sitting. This is where the economic buildings guide earns its name: production without storage just donates resources to the void.
The Warehouse is the single most important structure to upgrade alongside your resource mills. Each Warehouse level adds 500 to every resource cap and unlocks a 5% conversion discount at level 3, which is the difference between 70 oil turning into 49 steel and 70 oil turning into 53 steel. The numbers look small, but over a 4-hour AFK session the difference is one extra Cruiser hull.
| Warehouse level | Wood cap | Steel cap | Oil cap | Conversion discount |
|---|---|---|---|---|
| 1 | 1,300 | 1,100 | 900 | 0% |
| 2 | 1,800 | 1,600 | 1,400 | 0% |
| 3 | 2,300 | 2,100 | 1,900 | 5% |
| 4 | 2,800 | 2,600 | 2,400 | 5% |
| 5 | 3,300 | 3,100 | 2,900 | 10% |
Veteran players run Warehouse to level 3 before they ever upgrade the Command Post past level 3, because the storage cap unlocks the next tier of every economic structure. If you want a hands-off base optimization tip, this is the single biggest one: always over-cap storage before you over-level production.
Oil-to-Steel Conversion: When It Hurts and When It Helps
The conversion rate is normally 1 oil → 0.7 steel, which is a raw 30% loss. The Warehouse discount shrinks that to 0.77 steel at level 3 and 0.77 steel at level 5 (10% discount). The conversion triggers automatically when your oil cap fills, so leaving the rig running overnight without a Warehouse at level 3+ is the most expensive AFK mistake in the game.
If you are desperate for steel and your Warehouse is sitting at level 4 with a full oil tank, manual conversion is still a net loss compared to just waiting for the next Steel Mill tick. Reserve conversion for emergency hull repairs and the rare case where you need 30+ steel in the next 2 minutes.
Naval Base Guide: Ship Classes, Dock Layout, and Queue Pipelining
The naval base guide section is where the build order converges with fleet doctrine. Each Dock tile has 4 adjacent water tiles, and the game buffs ships launched from a Dock whose front face points toward open water. Most beginners place the Dock with its back to the island, which silently cuts ship speed by 15% on launch.
| Ship class | Hull cost (W / S / O) | Build time (tier-2 Dock) | Role | Best paired with |
|---|---|---|---|---|
| Destroyer | 200 / 80 / 30 | 9 min | Scout, anti-sub | Watchtower ring |
| Cruiser | 450 / 220 / 80 | 18 min | Mid-line DPS, anti-air | Defense Turret ring |
| Battleship | 900 / 480 / 200 | 32 min | Heavy line holder | Coastal Battery |
| Submarine | 350 / 90 / 140 | 11 min | Flank, raid, vision denial | Submarine Pen |
| Aircraft Carrier | 1,200 / 360 / 380 | 42 min | Sustained air DPS | Aircraft Carrier Hangar |
For a 6-player alliance running a contested island, the meta composition is 2 Destroyers, 2 Cruisers, 1 Battleship, 1 Submarine, and 1 Aircraft Carrier, in that pipeline order. Pipelining means you queue the Destroyer, then 4 minutes later queue the Cruiser so the Cruiser finishes the moment the Destroyer is launched. Skilled alliances report a 12 to 15% higher sortie rate by pipelining versus queuing in bulk, because the build-time overlap keeps the Dock at 90%+ utilization.
Co-op Builds: The 6-Player Island Split
In a full 6-player co-op session, the island effectively becomes three sub-bases. Player 1 and 2 own resource production (Lumber Mill cluster, Oil Rig cluster), player 3 and 4 own the Dock and Shipyard, and player 5 and 6 own defense (Watchtower ring, Turret ring, Coastal Battery). The Command Post and Warehouse stay neutral and are funded by the alliance pool.
A co-op base optimization tip that does not show up in solo play: build the second Dock on the opposite shoreline from the first, so a flanking fleet has to fight through your Turret ring twice to reach your shipyard. Most rival crews only scout the primary Dock and miss the second one entirely until they have already lost two ships to ambushes.
For newcomers to alliance play, the Navy War base building guide details the team-resource split — including practical strategies for handling free-riders who never contribute oil to the alliance pool, a common frustration in co-op sessions that can cripple the group's ship production timeline.
Base Optimization Tips: Queue Discipline, AFK Safety, and Patch Awareness
The base optimization tips below are pulled from the most consistent community findings across public and alliance servers, filtered through the base building priorities established earlier in this navy war base expansion guide. Each tip is keyed to a specific failure mode — the first three address resource stalls that stall economic buildings list progress, while the last two target tactical mistakes that quietly nerf your naval base guide layout after patches. Apply them in the listed order if you are rebuilding a base that is stuck, since the queue discipline fix depends on the Oil Rig already being tier 2.
-
Never let your oil cap fill. A full oil cap is silent waste; build a second Oil Rig before you upgrade any single resource building to level 5.
-
Queue the next hull 60 seconds before the current one finishes. The Dock has a 90-second warmup window, and missing it adds 6 to 8 minutes of dead time per hull.
-
Scrap (do not sell) obsolete Watchtowers at level 1. Selling returns 30% of cost; scrapping returns 60% and re-grants the tile.
-
Save the Fortress unlock for the weekend. The 30+ hour tier-5 grind syncs with the weekend event that doubles fortress XP, so starting on a Friday night saves roughly 11 hours.
-
Re-export your base every patch. The September 2026 patch slightly resized the Watchtower hitbox; pre-patch bases can clip into the Coastal Battery and lose 18% effective range.
A stale base export also throws off the auto-balanced ranges that the naval base guide relies on, so even un-touched Watchtowers can start reporting weaker DPS numbers than the Coastal Battery arc suggests. The September 2026 patch alone shifted the Watchtower hitbox by roughly 4 tiles, which is why a fresh re-export from the build menu is treated as mandatory upkeep in any navy war base expansion guide rather than a cosmetic refresh, and skipping it costs you 18% effective range on every turret that was placed before the patch.
When the Optimization Loop Breaks
Every base hits a wall around the tier-4 to tier-5 transition, because the resource costs spike by 2.5x and the storage caps stop scaling at Warehouse level 5. The official community wiki (linked from the Navy War Roblox page) flags this transition as the "Naval Fortress Wall" and recommends either (a) alliance resource pooling, (b) conversion cycles to bridge the steel gap, or (c) retreating to a satellite island to farm ore for the Factory.
For a deeper dive into layout theory, the Navy War best base layout guide covers defensive spacing, turret overlapping cones, and how to bait enemy submarines into your Watchtower killzone while keeping your production structures safe.
Frequently Asked Questions
How long does a tier-3 base take in Navy War?
A solo player can hit tier-3 (Dock L3, Warehouse L3, Shipyard online, Defense Turret ring) in roughly 14 hours of active play, or about 4 calendar days at 3 to 4 hours per day. A coordinated 6-player alliance usually reaches the same milestone in 6 to 7 hours of shared play because the resource output is pooled and queue time is fully utilized.
What is the best first ship to build in Navy War?
The Destroyer is the best first ship because it costs 200 wood, 80 steel, and 30 oil, finishes in 9 minutes on a tier-2 Dock, and gives you a scout hull to reveal rival islands before you commit to a Cruiser or Battleship. Queue it the moment the Dock hits tier 2, then pipeline a Cruiser 4 minutes later for a smooth handoff.
Do I need the Factory if I only play solo?
Yes, but you can delay it. A solo player who raids coastal camps for 20 minutes every 2 hours extracts roughly 90 ore per run, which the Factory turns into 126 steel. Without the Factory that ore is unsellable, so you still need the building; just build it after the Submarine Pen if you are racing tier 5.
Can two players share one Dock without penalties?
Yes, the game allows up to 3 builders to feed a single Dock with 0% throughput loss, which is the foundation of the 3-player Dock meta. Beyond 3 builders the queue time scales by 1.1x per extra player because of synchronization overhead, so co-op crews cap Dock contributions at 3 to keep build time optimal.
What is the fastest reset if my base is stuck?
The "coastal retreat" reset is the fastest: scrap every structure in rings 2 and 3, move to a satellite island via the Aircraft Carrier, and rebuild the rings in the correct order. Players who attempt this report a clean recovery in 3 to 4 hours, while tearing the whole base down and starting from scratch on a new island takes 18 to 22 hours.